Uploading
ARM µCs come with a built-in bootloader. Depending on the vendor and model, these can be used via a UART, USB, I2C, SPI, and/or CAN. Low-end µC's such as the STM32C0 and STMG0 series only support UART and I2C. The drawback is that the µC needs to be placed in "bootloader mode", which usually requires pressing one or two buttons - not great for frequent use.
The other option is JTAG/SWD. On µC's with low pin counts, the newer SWD is more convenient as it only needs two pins. This requires a hardware debugger, such as ST-Link, JLink, or the open-source Black Magic Probe.
ST-Link
The ST-Link is an STM product, but there are many clones which work equally
well. Older ST-Links (and many clones) lack an extra UART console port, which
is very useful for development. All "Nucleo" and "Discovery"
development boards from STM include an ST-Link on board and it's well-supported
in PlatformIO with upload_protocol = stlink.
There's a very nice small clone from WeAct (see AliExpress) - with UART support - which is compatible with STM's updater. It has all the pin connections one could wish for: +3.3V and +5V power, SWD, UART, RESET, and SWO.
It comes with a cable to connect to pin headers on the target board as needed.
For Nucleo and Discovery boards, the ST-Link is an excellent option, but for other boards there is an even more flexible and capable alternative: the BMP. Note that on-board ST-Links could optionally be re-flashed with BMP firware.
Black Magic Probe
The "BMP" is an open-source project which can be built for a wide variety of boards, including the "BluePill" (STM32F103) and the "BlackPill" (STM32F411). It can also be purchased as finished product.
A fairly recent development is that the project has been renamed to "Black Magic
Debug" and can now also run on the host (i.e. MacOS, Linux, Windows). In this
mode, the blackmagic application will use whatever hardware probe it finds,
including ST-Link, JLink, and of course the BMP variants themselves. This is not
as effective as a direct BMP hookup because the USB link adds extra latency
while polling over SWD.
Setting up a BlackPill
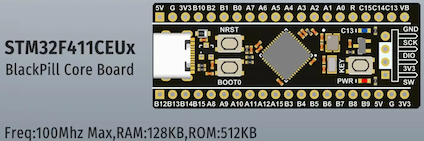
There are a few variants called "Black Pill". This is about the STM32F11CE version, as available from AliExpress.
Warning
Get the version with a 25 MHz crystal. The 8 MHz version is not currently supported out of the box with BMD's convenient build system.
See the README on Codeberg for detailed instructions on how to get, build, and upload the firware. Here is the shell script I'm using on MacOS:
# first put the BP-F411 in bootloader mode: boot0 + nrst
cd blackmagic
rm -rf build-f411ce
meson setup build-f411ce --cross-file=cross-file/blackpill-f411ce.ini -Dbmd_bootloader=true
ninja -C build-f411ce
ninja -C build-f411ce boot-bin
dfu-util -d 0483:df11 --alt 0 -s 0x08000000:leave -D build-f411ce/blackmagic_blackpill_f411ce_bootloader.bin
sleep 2 # delay to re-enumerate after reset
dfu-util -d 0483:df11 --alt 0 -s 0x08004000:leave -D build-f411ce/blackmagic_blackpill_f411ce_firmware.bin
That's it. The main pins for a BlackPill-based BMP are:
PB8 = SWCLK
PB9 = SWDIO
PA5 = NRST
PA2 = UART TX
PA3 = UART RX
PB7 = SWO
Onlt SWCLK, SWDIO, and GND are essential, the rest is optional. Short wires work best for high-speed connections.
Upload example
Uploading formware to a target board with an ST-Link or Black Magic Probe requires just 4 wires: +3.3V, GND, SWCLK, and SWDIO. A fifth RESET wire is only needed in case the target is in deep power down mode, or if it has disabled its SWD pins: by pulling RESET low, the ST-Link or BMP can force its way in by "uploading under reset". Here is a simple BMP-based setup:
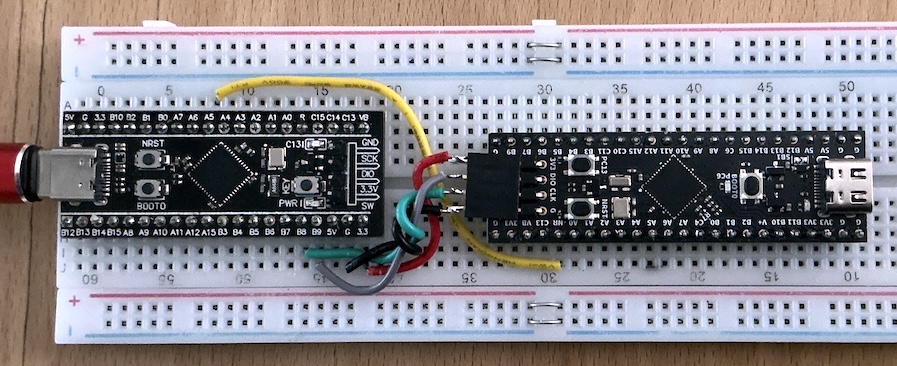
Left is the F411 "BlackPill" BMP, right is the G474 target. GREEN + GRAY are for SWD, The (optional) RESET wire is YELLOW. In this example, 3.3V power to the target is from the BMP. SWD and GND are short and twised to improve signal integrity.